(Last updated on January 9th, 2023)
We install antivirus software to protect our PC from various digital threats, safeguard payments, prevent identity theft, control our kids’ online activity, improve PC performance, and much more.
However, at times, you may need to uninstall antivirus from your computer, maybe because you have found a better antivirus package from another company or you are not happy with the product you are using or you just want to uninstall the software temporarily.
This article guides you through the uninstallation process of Norton’s products.
Removing Norton from Windows Devices
There is a slight difference in steps when it comes to removing Norton from different Windows versions.
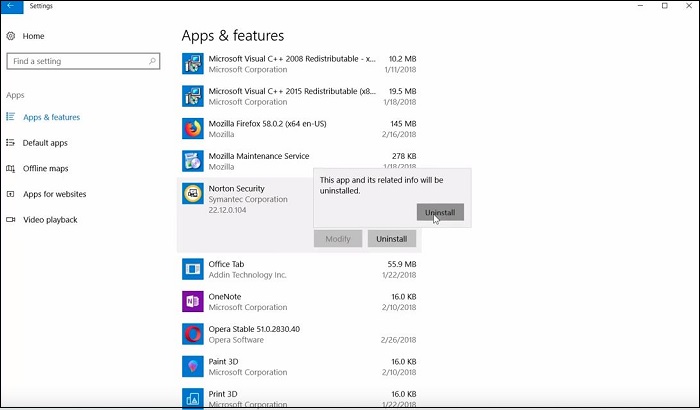
Uninstall Norton in Windows 10
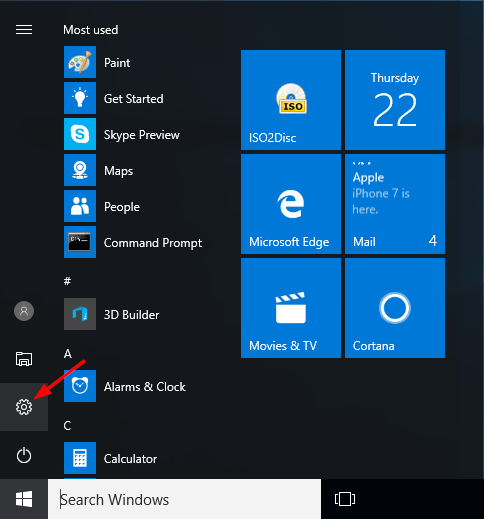
- Click on the Start menu and access Settings. (The option is usually hidden and is represented by a gear icon.)
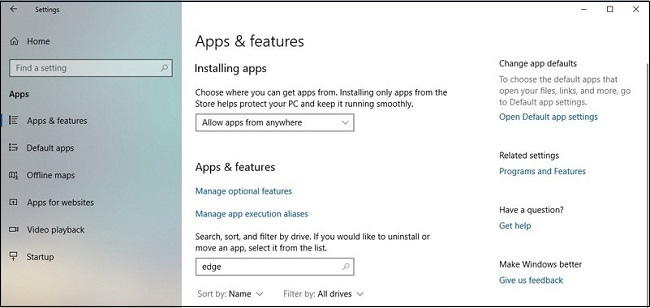
- From Settings, click the Apps button to open the Apps & Features section.
- Select the Norton suite you want to uninstall. If you have a lot of programs installed on your device, you can also type ‘Norton’ in the search bar to find the software.
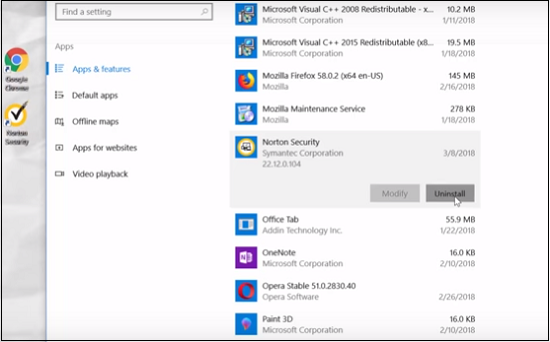
- Click the Uninstall button that appears under the selected item.
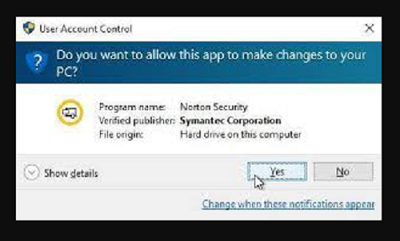
- Click Yes if prompted by the Windows for verification.
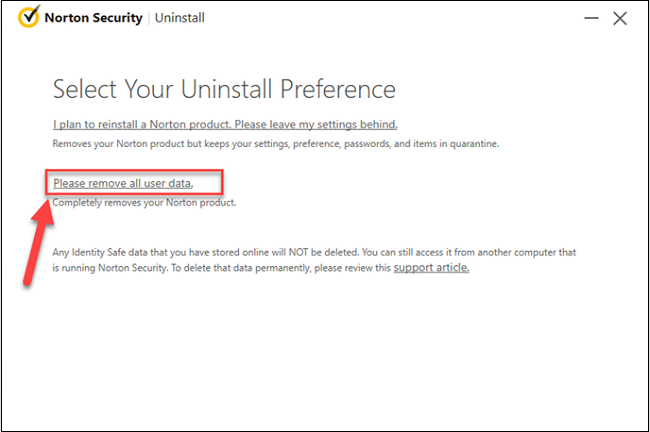
- Follow on-screen instructions to remove Norton from your PC completely.
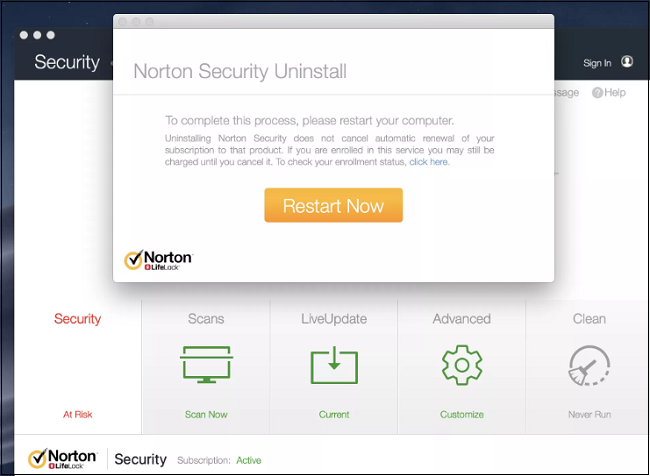
- Finally, Restart your PC to complete uninstallation and apply changes to your computer.
Uninstall Norton in Windows 8
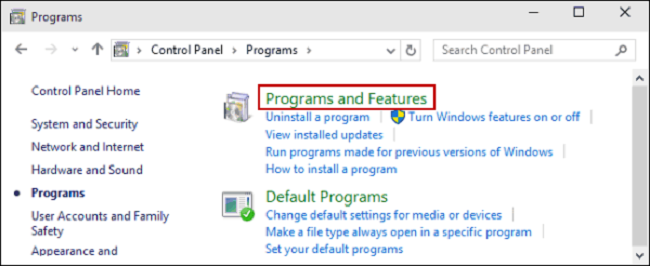
- Go to Apps and click Control Panel from Windows System.
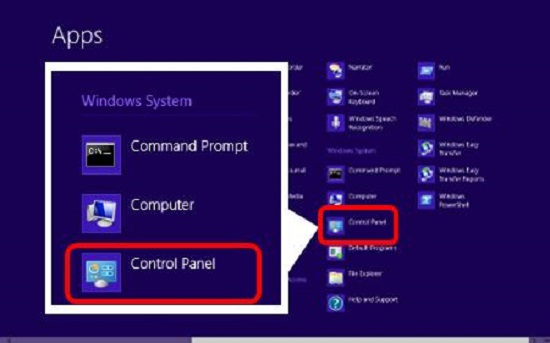
- Select Programs & Features from the menu.
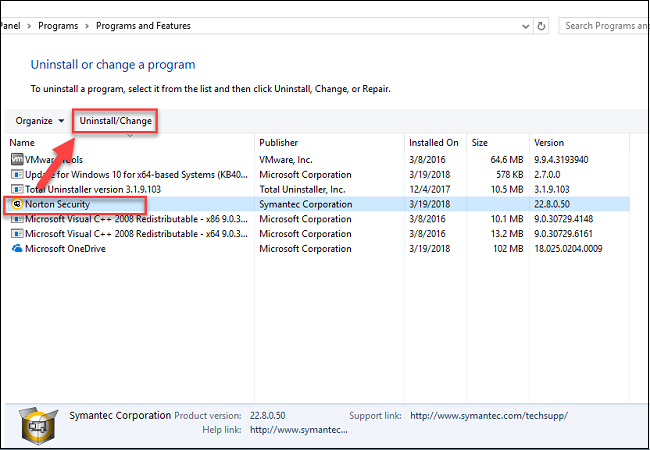
- From the list of programs that appear, right-click the Norton product you want to remove from your system and then click Uninstall/Change. You can also click the Norton product and then click Uninstall/Change from the top bar.
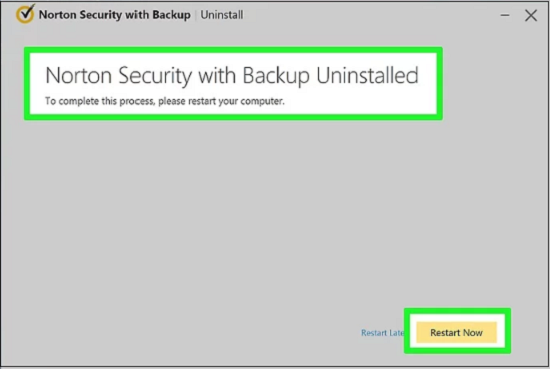
- If prompted by Windows for confirmation, click Yes to begin uninstallation.
- Restart your PC to remove Norton from your system and apply changes.
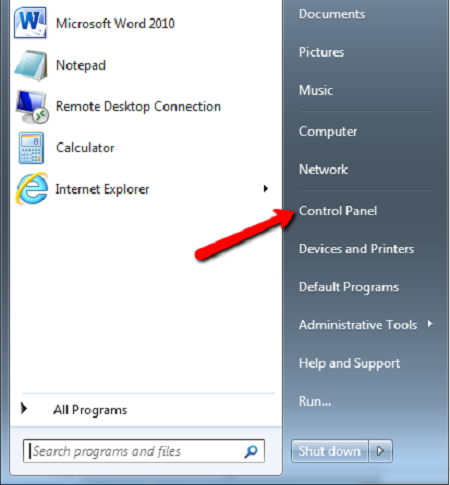
Uninstall Norton in Windows 7
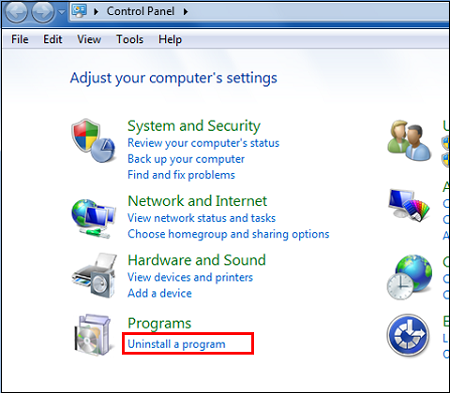
- From the Start menu, access Control Panel.
- Click Programs and Features.
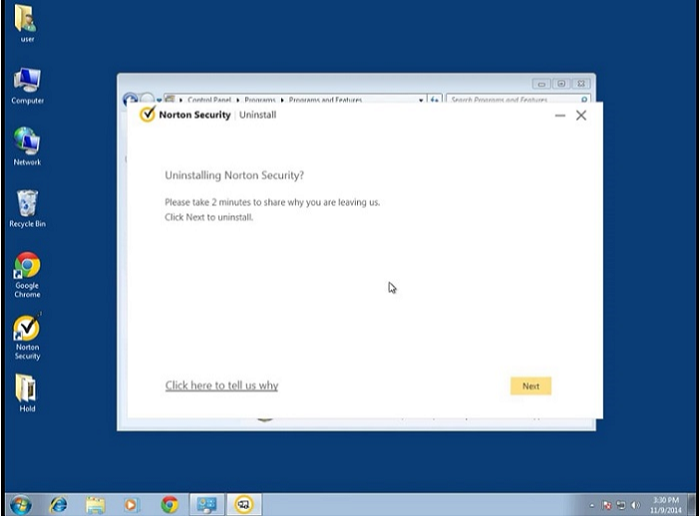
- Locate and select the Norton suite you want to uninstall from the list of installed applications appearing on the screen. Click Uninstall/Change.
- You may see a prompt by User Account Control dialog for confirmation. Click Yes to continue.
- Then click Uninstall to begin the process.
- Restart your computer to get a Norton-free PC.
Uninstall Using Norton Removal Tool
Sometimes Windows users face a tough time while uninstalling Norton from their computers while using the above methods. You either receive a message showing an error has occurred or the software has already been uninstalled when you try to uninstall the antivirus software.
If you are facing the same problem, then you should install the Norton Removal and Reinstall Tool directly from the company’s website. All you have to do is:
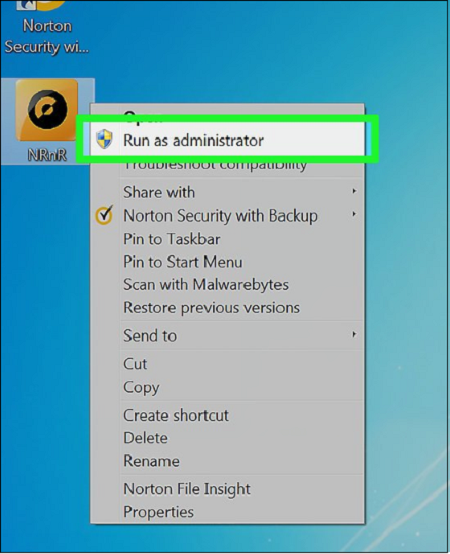
- Go to Norton’s official website and download Norton Removal and Reinstall Tool.

- Access the folder than contains the downloaded utility and run the Norton_Removal_Tool.exeYou will receive a security warning. Click Yes to continue.
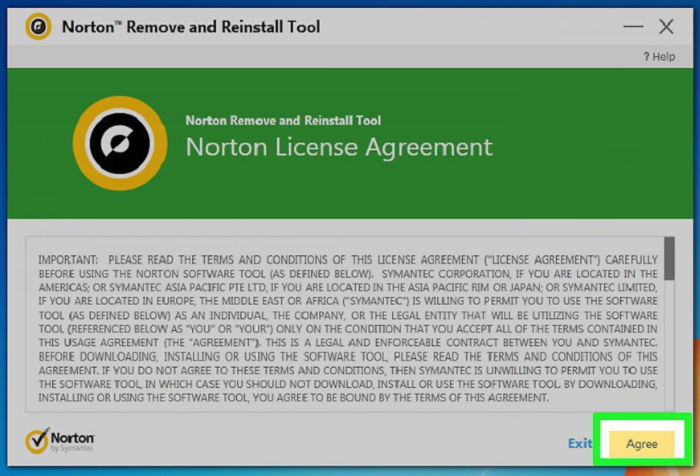
- Click Agree on the End License Agreement (EULA) page.
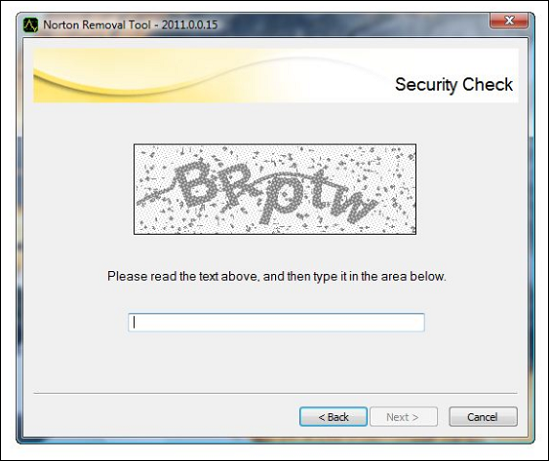
- Carefully type the characters shown on your screen and click Next.
- Once all the files of Norton software removed from your system, click Restart to apply new settings.
- Delete the Norton_Removal_Tool.exe tool from your PC after the completion of the uninstallation process.
- Go to Program Files and Program Files (x86) folders and delete the following folders (if present):
- Norton AntiVirus
- Norton Internet Security
- Norton SystemWorks
- Norton Personal Firewall
Removing Norton from Mac Devices
To uninstall Norton from your Mac device, follow these steps:
Uninstall Norton Manually
- Access Launchpad and launch the security app.
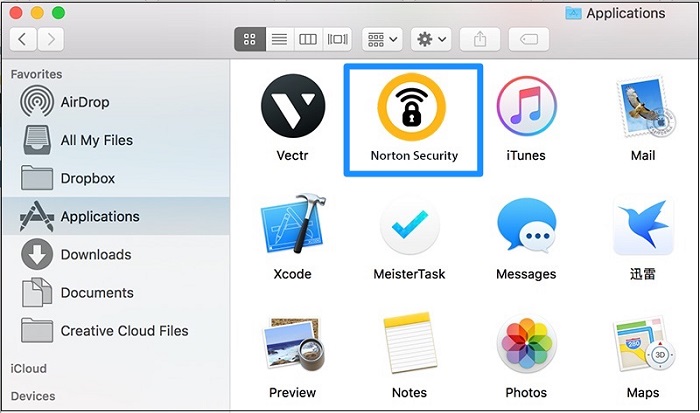
- Go to Menu and click Norton Security.

- Right-click on Norton Security and click Uninstall.
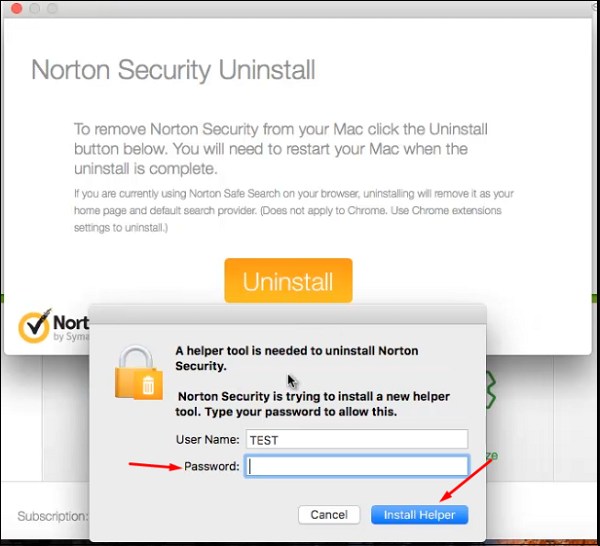
- Enter your administrator password when asked for confirmation and click OK.
- Wait till the completion of the process, which will take a few seconds.
- Restart your device to finish the uninstallation.
- Check your system for any junk files that could remain on the hard drive even after uninstallation.
- Go to Library and delete Norton Internet Security service files.
- Open the Finder that appears in the dock. Then click Go and access ~/Library.
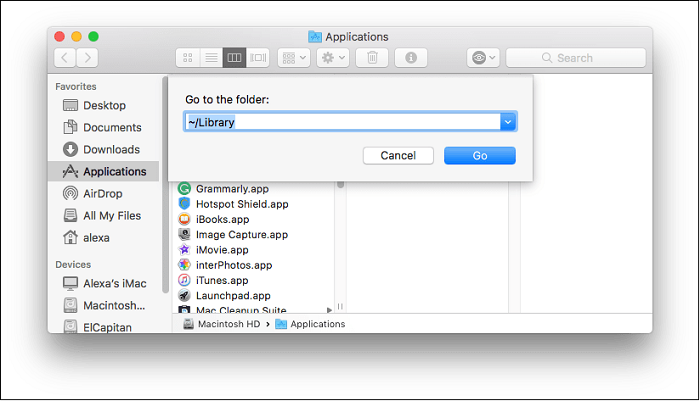
- Check the next subfolders and remove unneeded remains:
- ~/Library/Application Support
- ~/Library/Caches
- ~/Library/Container
- ~/Library/Preferences
Uninstall Norton Using App Uninstaller
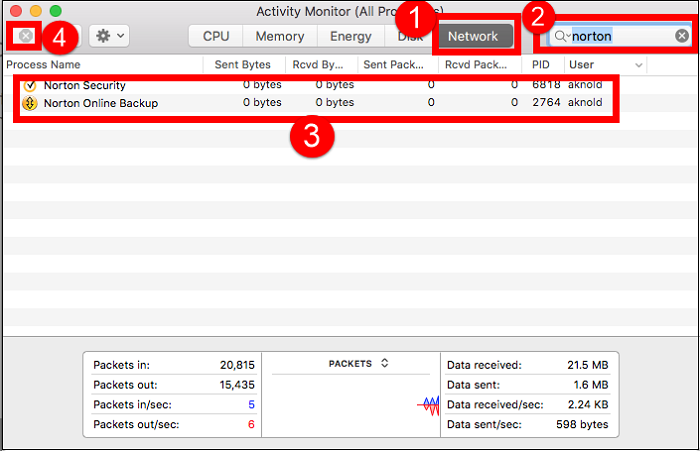
You may face common problems while uninstalling Norton from your Mac. For example, you may still get notifications even after completely uninstalling the Norton software.
Most Mac users go for an easy and reliable method to get rid of stubborn apps like Norton products from their devices. Omni Remover 2 is considered as one of the best Mac App Uninstaller utilities.
If you are looking for a way through which you can quickly remove Norton from your Mac, follow the steps below:
- Download Omni Remover 2 on your Mac.
- Launch Omni Remover 2 and access App Uninstall tab.
- Find Norton Security and click the Scan to Uninstall button.
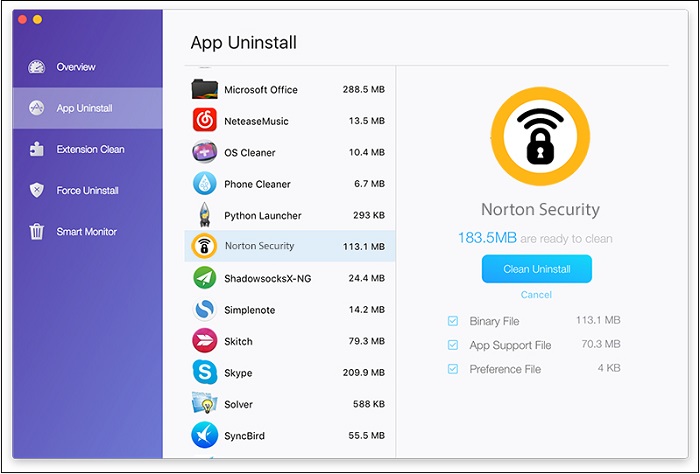
- After Omni Remover 2 finished scanning Norton Security, it will show you all associated files like app binary file, saved status, preferences, caches, app support file, etc.
- Click Clean Uninstall to remove Norton Security and related app files completely from your Mac.

Anas Baig is a consumer privacy advocate and cybersecurity journalist by profession. Has has more than 7 years of professional experience under his belt. Anas has been featured on numerous media publications including The Guardian, Lifehacker, The Next Web, Infosecurity Magazine, Security Boulevard, Hacker Noon, CMS Wire, IAPP, SC Magazine, and many others. His interest includes Digital Privacy Rights, Information Security, Networking, Privacy, and Data Protection.
My Contributions:
Hacker Noon | TheNextWeb | DevOps.com | GlobalSign | CMS Wire | CSO | Tech.co | Security Boulevard | ITProPortal | MuckRack | Crunchbase